Settings and Customization
Title and URL
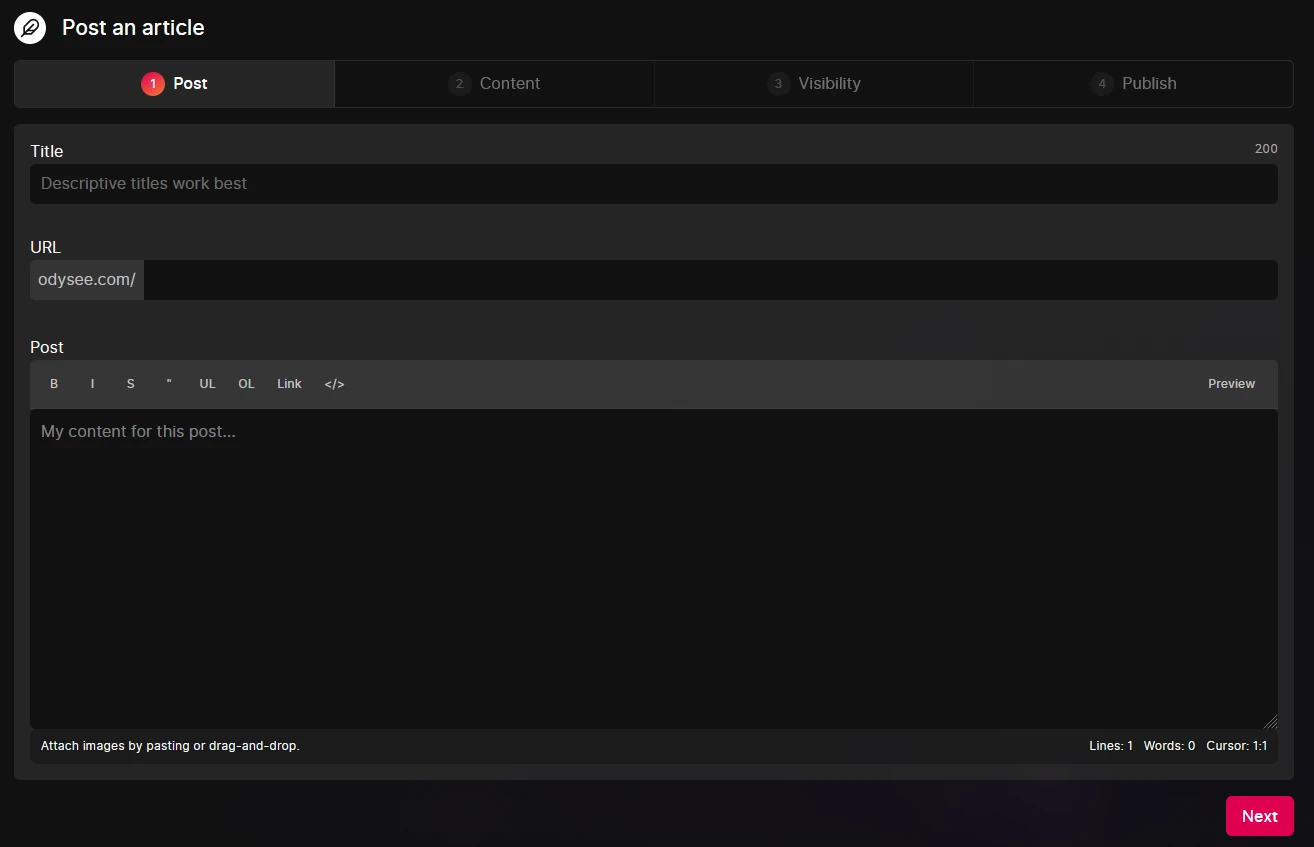
From this screen, the first field you'll be required to enter is Title. We recommend titles that accurately inform users of the contents, but are interesting and effective in enticing users to click.
Next is the URL. This is separate from the title. The title is what displays on the upload itself, this is simply what appears in the post's URL.
For example, our February feature roundup on the Odysee channel has the URL februaryroundup which appears in the URL, but the actual title of the post that shows to users is “New Year, New Us: Odysee Feature Roundup”.
Body and Syntax
The Body section is where you'll enter the contents of your post.
Our text editor uses Markdown. For a detailed guide on Markdown, click here.
If you're new to Markdown, we have a few options along the top of the text box to make things easier.
- Click the "B" to bold text
- Click the "I" to italicize text
- Click the quotation marks to turn text into a block quote
- Click the list icon to create a bulleted list
- Click the numbered list icon to create a numbered list
- Click the chain icon to create a hyperlink
The eyeball icon will allow you to preview your post.
Tags and Language
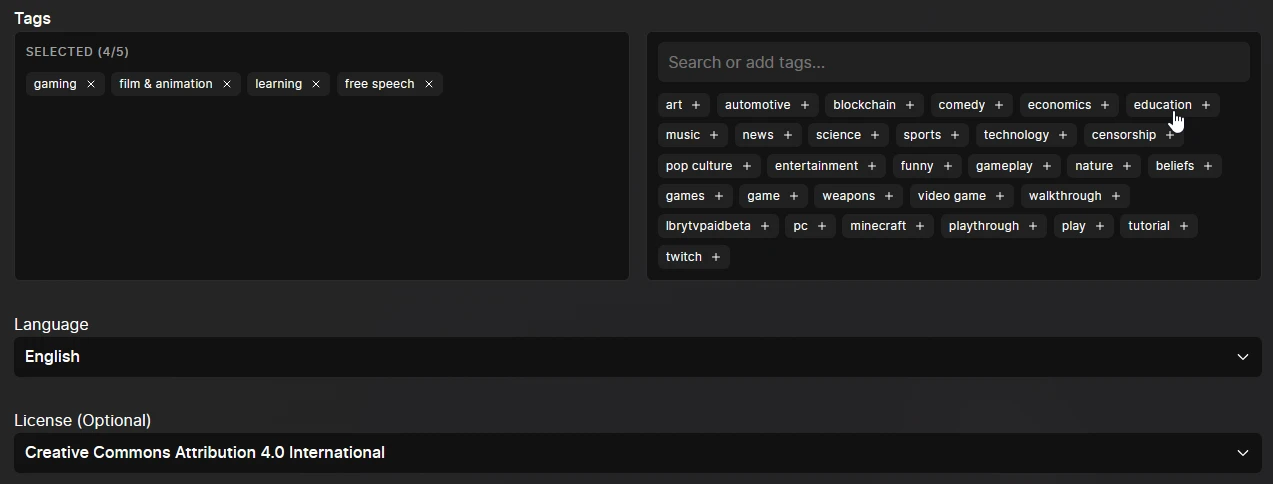
Next, you'll be asked to add Tags.
Tags improve the discoverability of content. We recommend simpler tabs relating to the genre of your content, e.g. Art, Gaming, Comedy, etc. At this time, each post (and channel) can only have up to 5 tags.
If your upload contains NSFW pornographic content, you must tag it with "Mature."
Next, you can select the post language and license type. You have different options from the drop-down menu.
The next option is Language. This defaults to your selected language.
The third option is License. This is for specifying the copyright license.
This defaults to "None." If no license is selected, the file will be copyrighted by default. Other licenses are:
- Public Domain licenses allow reuse with no restrictions
- Creative Commons licenses allow reuse with attribution to the original creator
- You can also set the license simply as Copyrighted.
Visibility
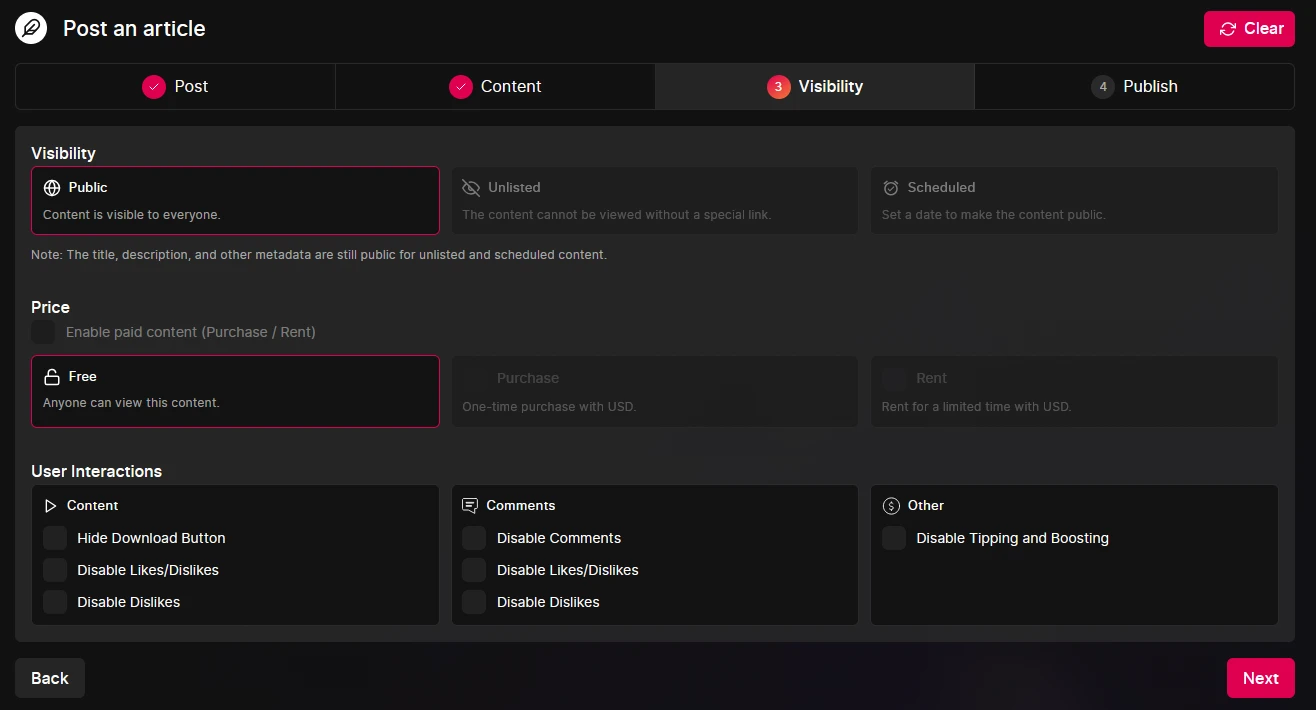
Next, you can set your content's visibility.
Public means anyone can find and view your upload.
Unlisted means anyone can view your upload if they have the link.
Scheduled means your content is currently hidden, but will go public at the date and time set.
Next is Price. This would be the amount viewers have to pay in order to view the content.
You can set this amount in Credits or USD. In either case, viewers would pay in Credits. If the price is set in Credits, that would be the amount of Credits paid. If the price is set in USD, viewers would pay the Credits equivalent.
Control Tags: Disable reactions on post and comments.
Creators and channel owners can disable reactions (fire and slime) from the post form in the Controls Tags options. You can turn off reactions for content, comments, or posting in general.
This functionality is optional and is not enabled by default in the content. Channel owners must enable tag controls from the post form, editing content, or from channel settings.
Channel Selection
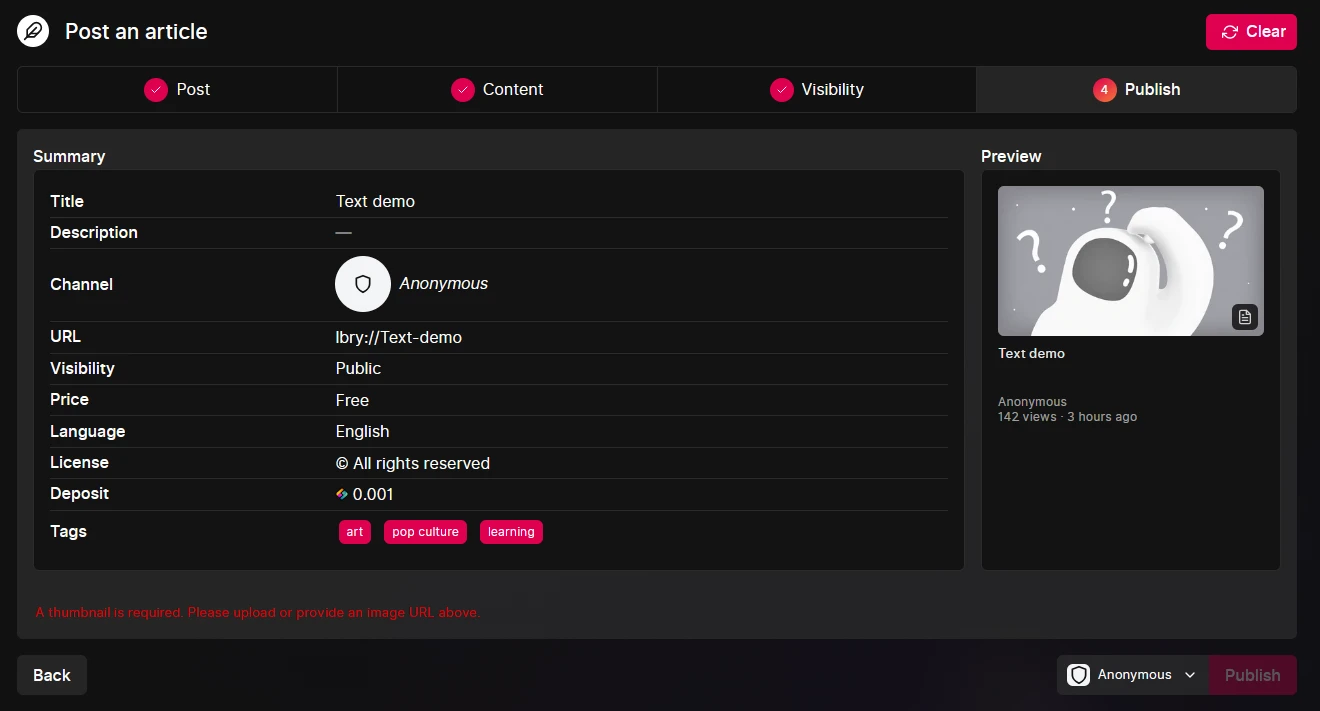
The last option is your Channel Selection. If you have multiple channels, this is where you'll select which the channel the upload will go to.
If every setting looks correct, you'll click Upload, and Confirm. It may take a few minutes for your post to finish uploading and upload to confirm, but this is the end of the upload process.