Settings and Customization
Title, URL, and Description
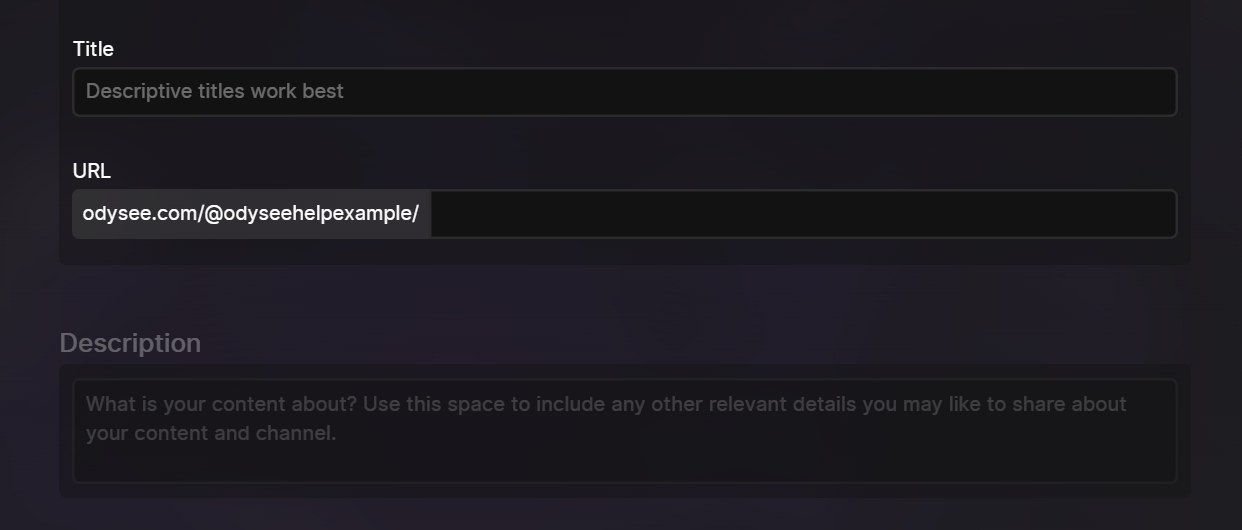
After your file is selected, the first required field is Title. We recommend titles that accurately inform users of the contents, but are interesting and effective in enticing users to click.
Next is the file's URL. This is separate from the title. The title is what displays on the upload itself, this is simply what appears in the video's URL.
For example, our February feature roundup on the Odysee channel has the URL februaryroundup which appears in the URL, but the actual title of the post that shows to users is “New Year, New Us: Odysee Feature Roundup”.
After the URL, we ask for a Description. Spamming keywords in the description has no effect on search, so we recommend simply using this field to explain your video in as few or as many words as necessary.
Thumbnails

Following the description, you'll be asked to add a Thumbnail.
For thumbnails, we recommend 1280 x 720 pixels. You can select a file from your computer or paste an image link. When uploading videos, you can select a thumbnail image from your video using our thumbnail upload tool.
Visibility
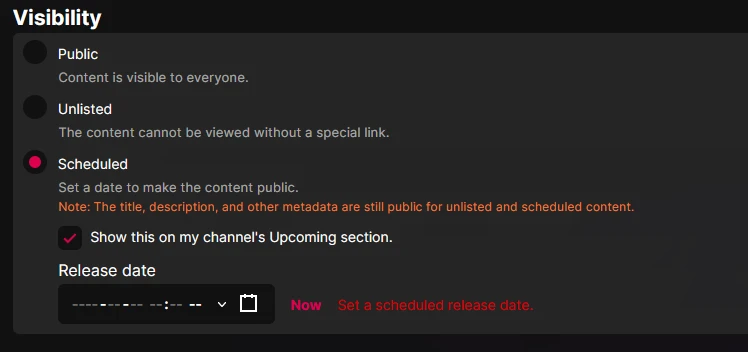
Next, you can set your content's visibility.
Public means anyone can find and view your upload.
Unlisted means anyone can view your upload if they have the link.
Scheduled means you content is currently hidden, but will go public at the date and time set.
Tags
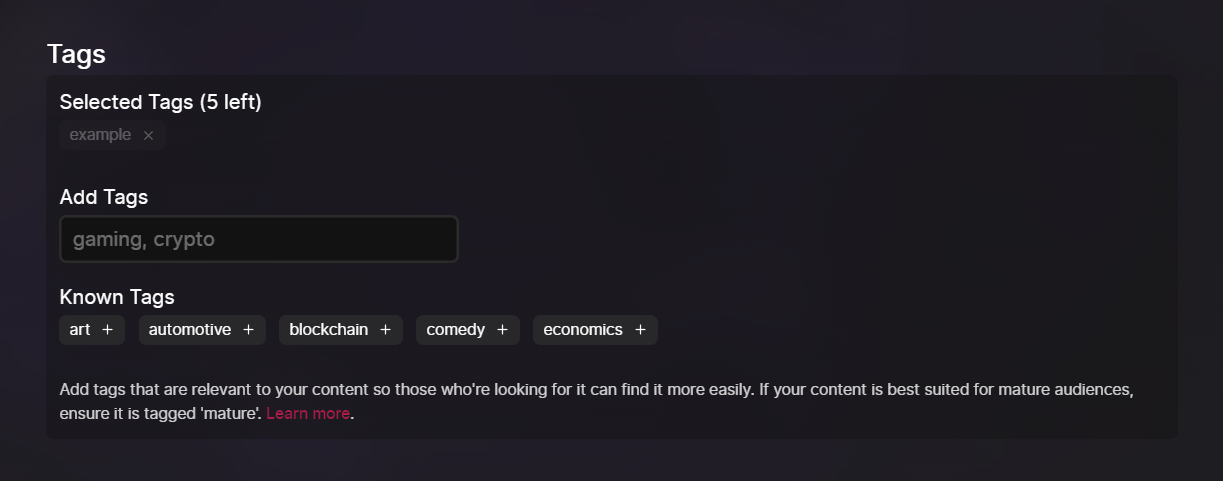
Next, you'll be asked to add Tags.
Tags improve the discoverability of content. We recommend simpler tabs relating to the genre of your content, e.g. Art, Gaming, Comedy, etc.
If your upload contains NSFW pornographic content, you must tag it with "Mature."
At this time, each video (and channel) can only have up to 5 tags.
Control Tags
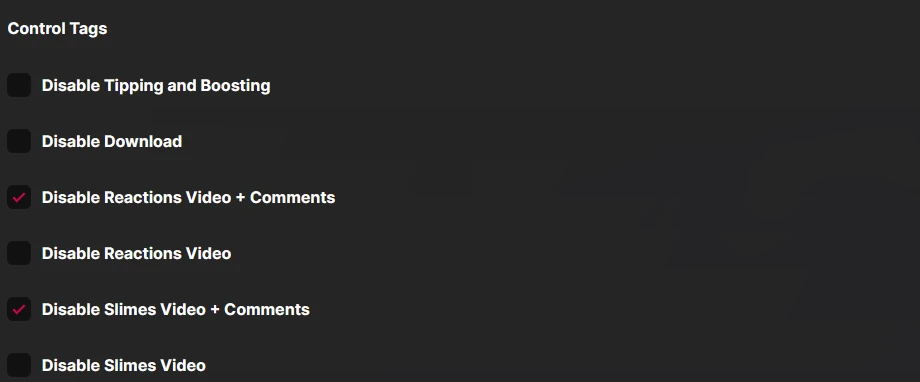
Disable reactions on videos and comments.
Creators and channel owners can disable reactions (fire and slime) from the post form in the Controls Tags options. You can turn off reactions for content, comments, or posting in general.
This functionality is optional and is not enabled by default in the content. Channel owners must enable tag controls from the post form, editing content, or from channel settings.
Additonal Options
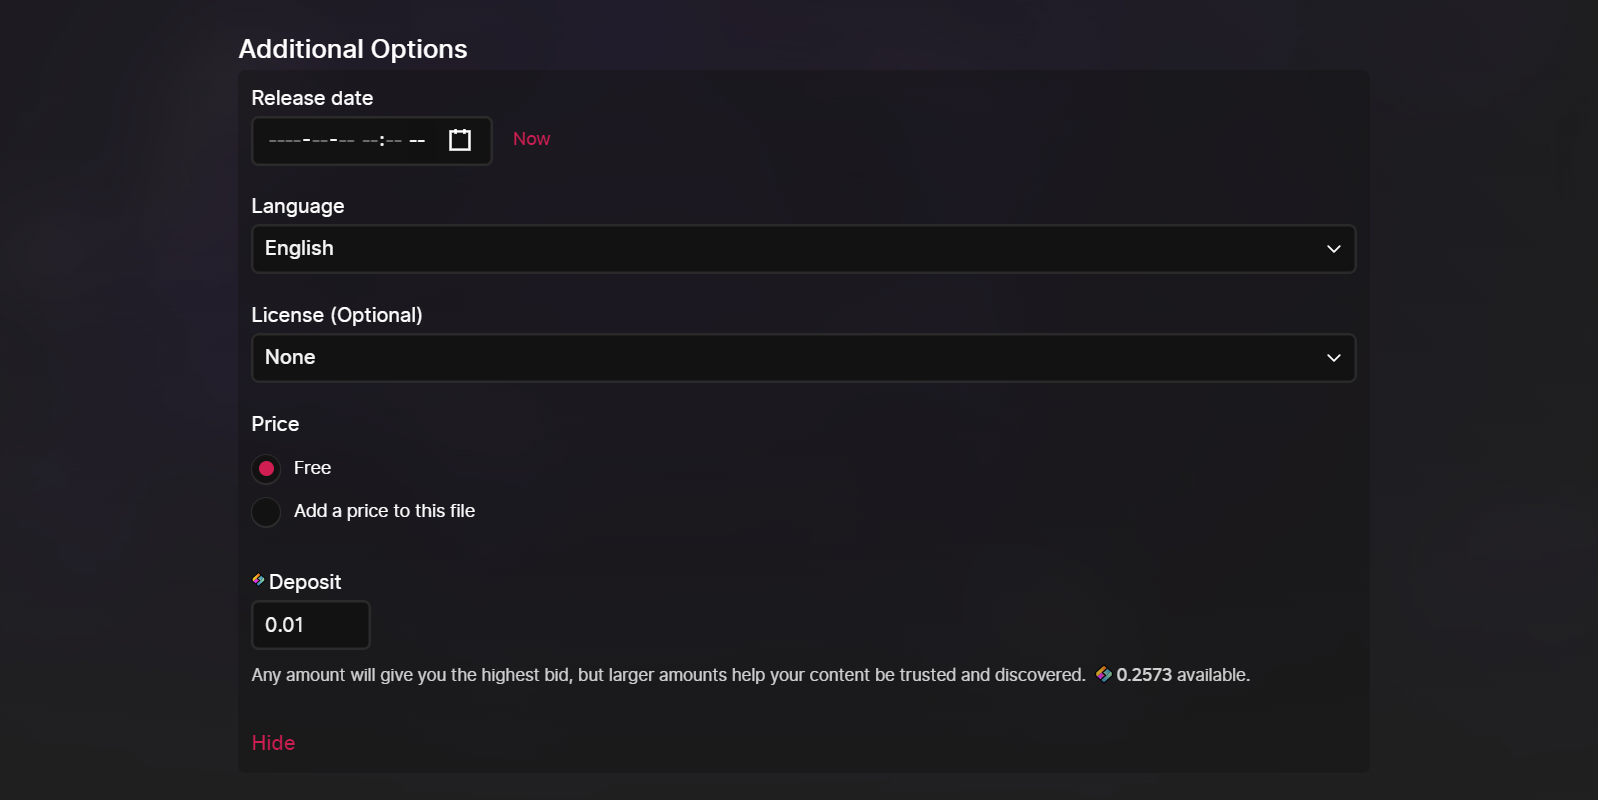
Under this tab, you have a few options.
First is Release Date. At this time you can't set videos for future dates, but you can set them for past dates. This is different from scheduled videos. It means that you can't change the publish date of a video for future dates, only for the date the video was published.
This is useful when uploading older videos. You can set them as the correct date, and they will show in the proper chronological order on your channel.
The next option is Language. This defaults to your selected language.
The third option is License. This is for specifying the copyright license.
This defaults to "None." If no license is selected, the file will be copyrighted by default. Other licenses are:
- Public Domain licenses allow reuse with no restrictions
- Creative Commons licenses allow reuse with attribution to the original creator
- You can also set the license simply as Copyrighted
Next is Price. This would be the amount viewers have to pay in order to view the content.
You can set this amount in Credits or USD. In either case, viewers would pay in Credits. If the price is set in Credits, that would be the amount of Credits paid. If the price is set in USD, viewers would pay the Credits equivalent.
Credit Deposit
The last setting under Additional Options is Deposit.
This defaults to 0.01 Credits. It can be lowered as far as 0.0001 Credits. If your file has the highest amount staked of any upload with the URL selected, it would appear first when searching for that URL.
For example, if two Odysee files have the URL "cat," the file with the higher Credits stake would appear first in the search results and would link from odysee.com/cat.
This all ties into the blockchain aspect of Odysee. We have a detailed section going through the ins-and-outs of this system here.
It's important to note that once you deposit Credits, it isn't gone forever. It'll still be in your wallet and under your control, but it'll be tied to the channel you're depositing to until the deposit amount is lowered, or the channel is deleted. For more information on this, check out our section on the wallet and transactions here.
Channel Selection

The last option is your Channel Selection. If you have multiple channels, this is where you'll select which the channel the upload will go to.
If every setting looks correct, you'll click Upload, and Confirm.
It may take a few minutes for your file to finish uploading and upload to confirm, but this is the end of the upload process.
If you uploaded a video or piece of content and you're on the wrong channel, you can edit the post and change the channel video from the channel selection tab.